Heart Easy to Draw Trash Easy to Draw
Drawing is an enjoyable hobby, and you can ace it with some practice. In this article, we'll show you how to draw a human heart in a few simple steps. So whether you want to teach your kid some anatomy or want to ace your biology class, jump right in!
How to Draw a Human Heart: A Step-By-Step Guide
The human heart is beautiful and has many intricate details that make drawing it enjoyable. Luckily, it's a pretty easy drawing and won't take you a long time. Here are the steps you should follow.
1. Prepare Your Drawing Supplies
The first step you should take is to prepare your drawing supplies. Generally, you only need a pencil, paper, and an eraser to draw a human heart. However, you can improvise and bring some red colors to breathe life into your drawing after finishing it.
2. Sketch the Outline of the Lower Chamber

The human heart doesn't have a definite shape; it isn't circular or squared. Instead, it looks a little lumpy with irregular lines.
So when sketching the heart's outline, you'll need to draw an irregular shape that resembles the continent of Africa loosely. The body you just drew is the outline of the heart's lower chamber, where you can find the right and left ventricles.
3. Draw the Aortic Arch

After sketching the lower chamber, you should draw the aortic arch coming out of it. First, draw two curved lines coming out of the lower chamber and heading upwards. Make sure to draw the line on the right shorter than the left one. Then, connect both lines by drawing a short line between them.
Beware that the aortic arch shouldn't be too long. Ideally, it should have the same length as the lower chamber you drew.
4. Draw the Pulmonary Trunk
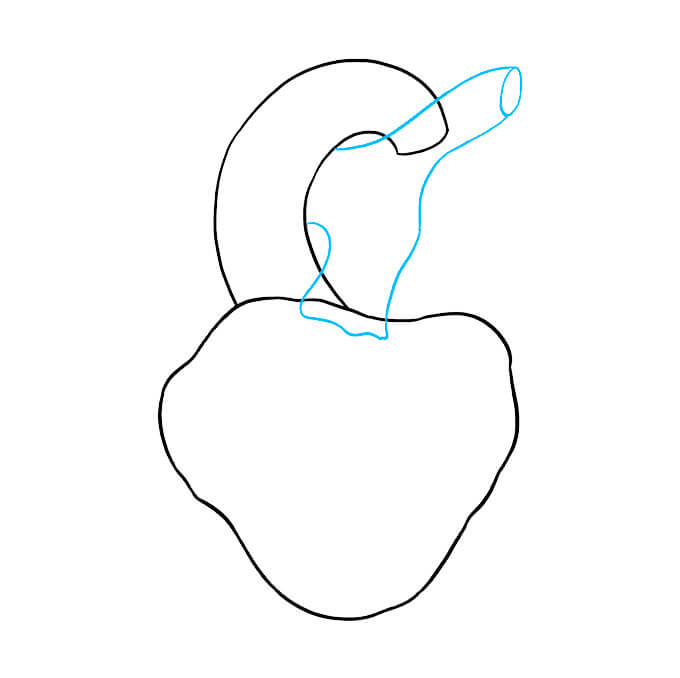
Drawing the pulmonary trunk might look tricky, but it's pretty easy if you focus enough. First, draw a short wavy line inside the lower chamber right under the aortic arch. Then, connect the line with the arch by drawing a slightly longer curved line.
Next, go to the other side of the wavy line and draw a curved line that extends taller than the aortic arch. End this line with a small oval, then connect it to the upper side of the aortic arch, right beneath its end, by drawing another curved line.
5. Draw the Right Atrium

After finishing your pulmonary trunk, you should begin drawing the right atrium and the superior vena cava. To illustrate the atrium, sketch an irregular shape that extends from the left side of the lower chamber to the middle of the aortic arch.
Then, to complete the superior vena cava, sketch a small vertical oval that touches the aortic arch above the right atrium by a short distance. Lastly, draw a curved line that extends from the upper point of the oval to the right atrium.
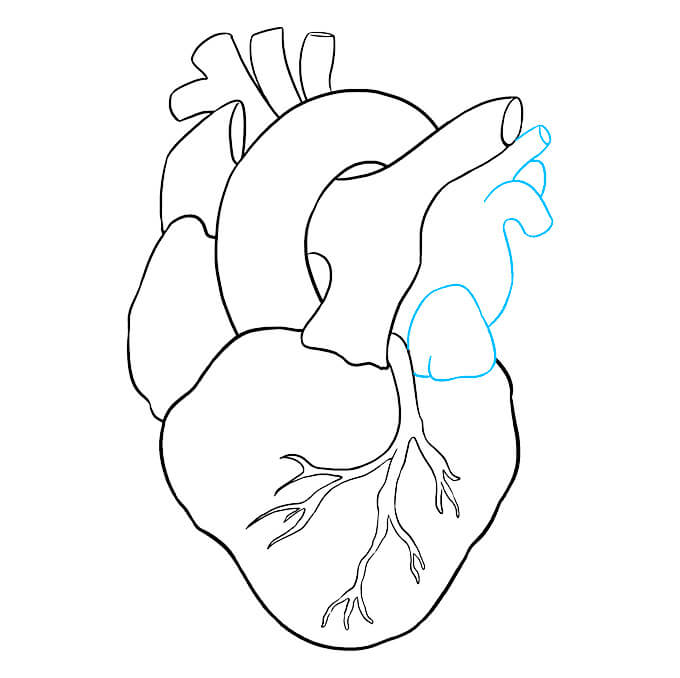
6. Sketch the Arteries
Your heart should look like a real human heart by now, but it needs a few final touches to be ready. In this step, you'll draw the left coronary artery coming from the pulmonary trunk's side and going across the heart's lower chamber.
You should sketch the artery as if you're sketching a tree's branches. You can also improvise a little bit with your curved lines. Your artery should end right above the bottom line of the lower chamber.
7. Draw the Major Arteries

Next, you should go toward the aortic arch and draw three major arteries behind it. To sketch one major artery, extend two slightly curved lines from the aortic arch, and connect them at the top with a short line. Draw three arteries, but the third should have two outlets. So you should draw two curved lines with a V-shaped line between them, then connect them.
Read also: How to draw a sunset with markers
8. Sketch the Left Atrium
Draw the left atrium by sketching an enclosed irregular shape next to the left coronary artery and above the lower chamber. Then, draw a curved line coming out of it that extends upwards and ends with a major artery, like the ones you drew in the previous step. Next, draw two other arteries behind the one you drew so that they're touching the pulmonary trunk.
9. Texture the Heart
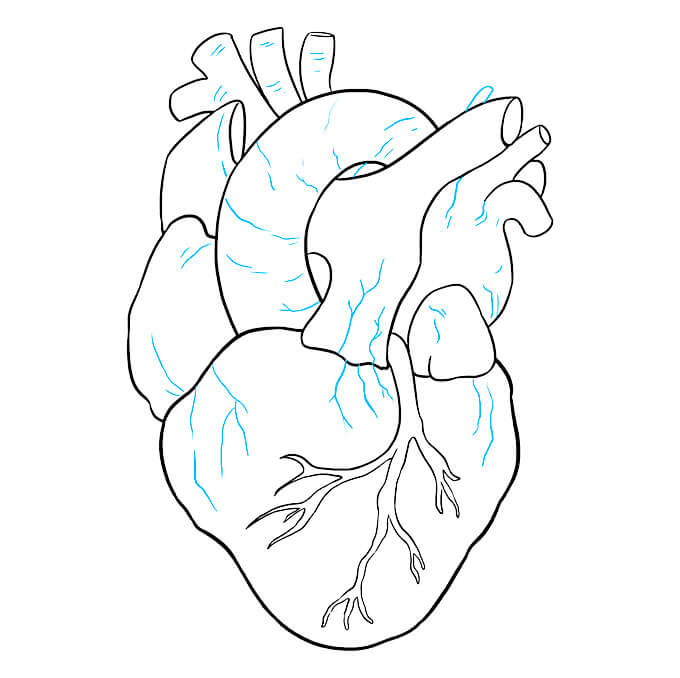
The final step of drawing a human heart is to decorate it with a few details to add some texture. For example, you can draw some short lines around the curves to make them look more realistic. Alternatively, you can branch some arteries and veins over the heart's atrium. And voila!
You have a real-looking human heart that you can use to teach your kids about its anatomy or to study biology. You can also color the parts of the heart that carry oxygenated blood in red and the parts that have deoxygenated blood in blue.
See also: Cute Animal Drawings
To Wrap Up
The human heart has many awe-worthy details, and learning more about it is always fascinating. You can add some fun to your learning journey by drawing a human heart and coloring it. It's easy, won't take you much time, and will help you remember its anatomy better.
Source: https://novacelestia.com/how-to-draw-a-human-heart/
0 Response to "Heart Easy to Draw Trash Easy to Draw"
Postar um comentário